Getting Started with Scratch
Installing Scratch
To get started go to https://scratch.mit.edu/ and create an account, or start the offline desktop version on your Raspberry Pi that comes pre installed (you can also download an offline version for PC). I’ll be using Scratch 3 online and desktop. Check out Scratch wiki for more help.
Scratch online will automatically save your projects. You can also share, download, upload projects.
Scratch offline (Desktop Version) does not automatically save. Be sure to save before closing.
Starting a Project
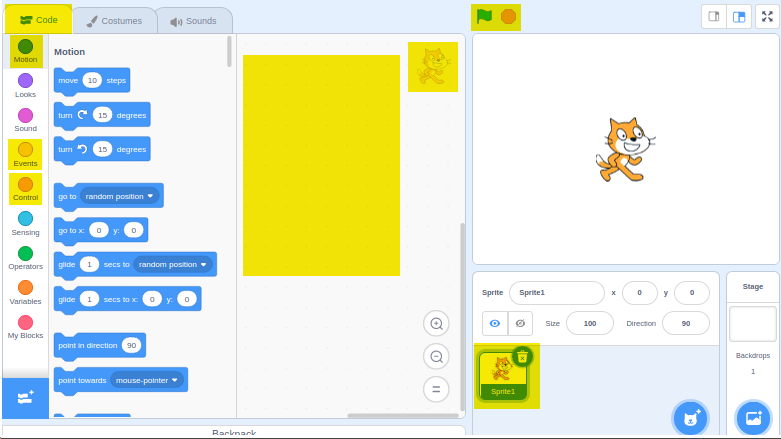
To start a project select the Create button. Initially focus on the Code and Sprite section. See highlighted areas below.
Code Blocks and Sprites
- Code Section - this is where your code blocks are located. You drag them from the side bar to your code or script area in the center. Start off with Motion, Events, and Control blocks.
- Sprite - this is what Scratch calls the characters. Each have their own set of code and costumes. You start with Scratch the cat. Later you can add sprites from a downloaded image or create your own in the Costumes tab.
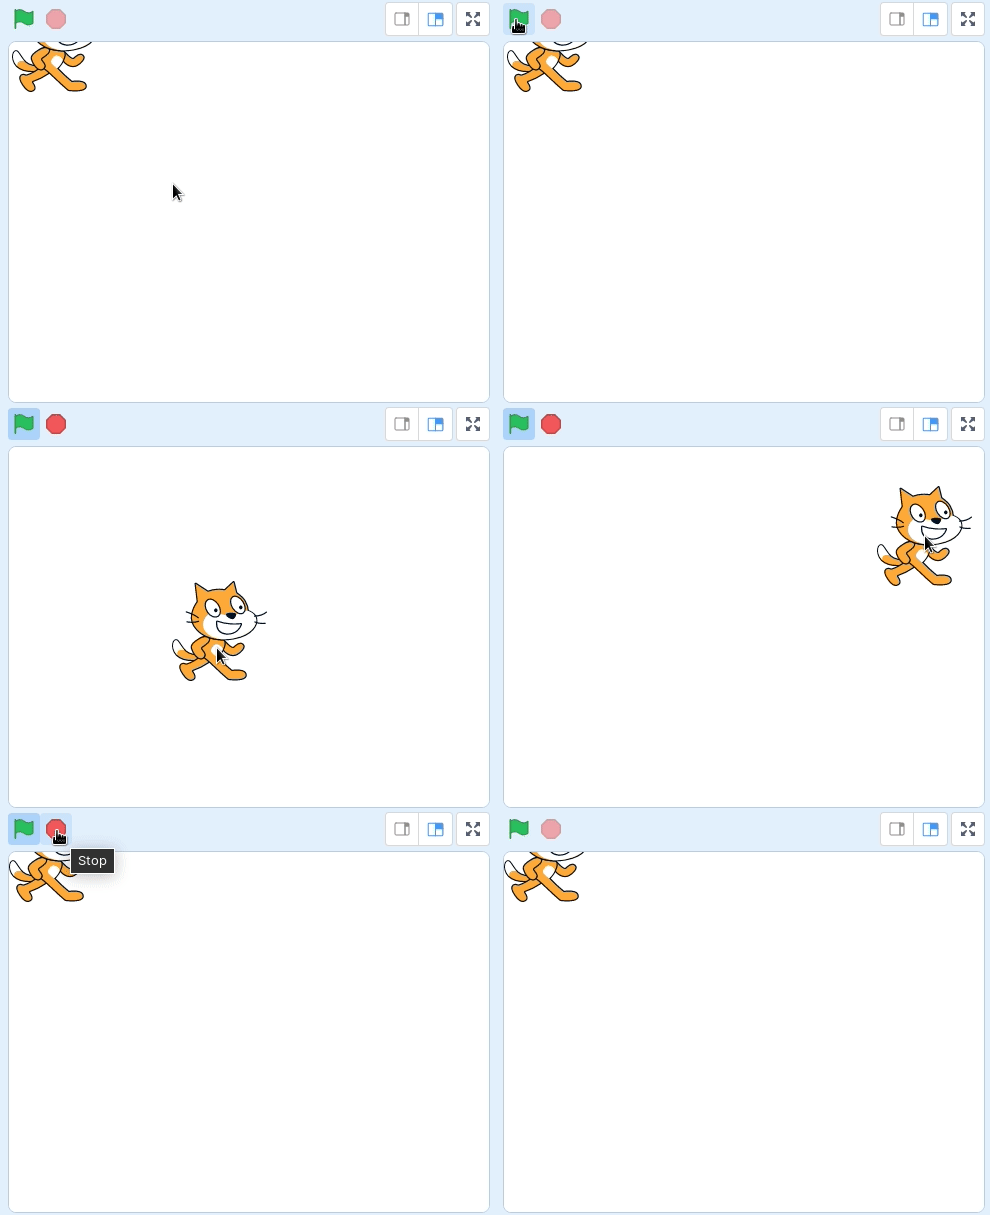
- After you drag code in the Script area, the Green flag and Red stop sign are how you Start/Execute and Stop/Quit the code.
Your First Code
There are a lot of windows in the Scratch IDE (Integrated Development Environment) and can be a little intimidating at first. Take it in little steps.
Initial Blocks
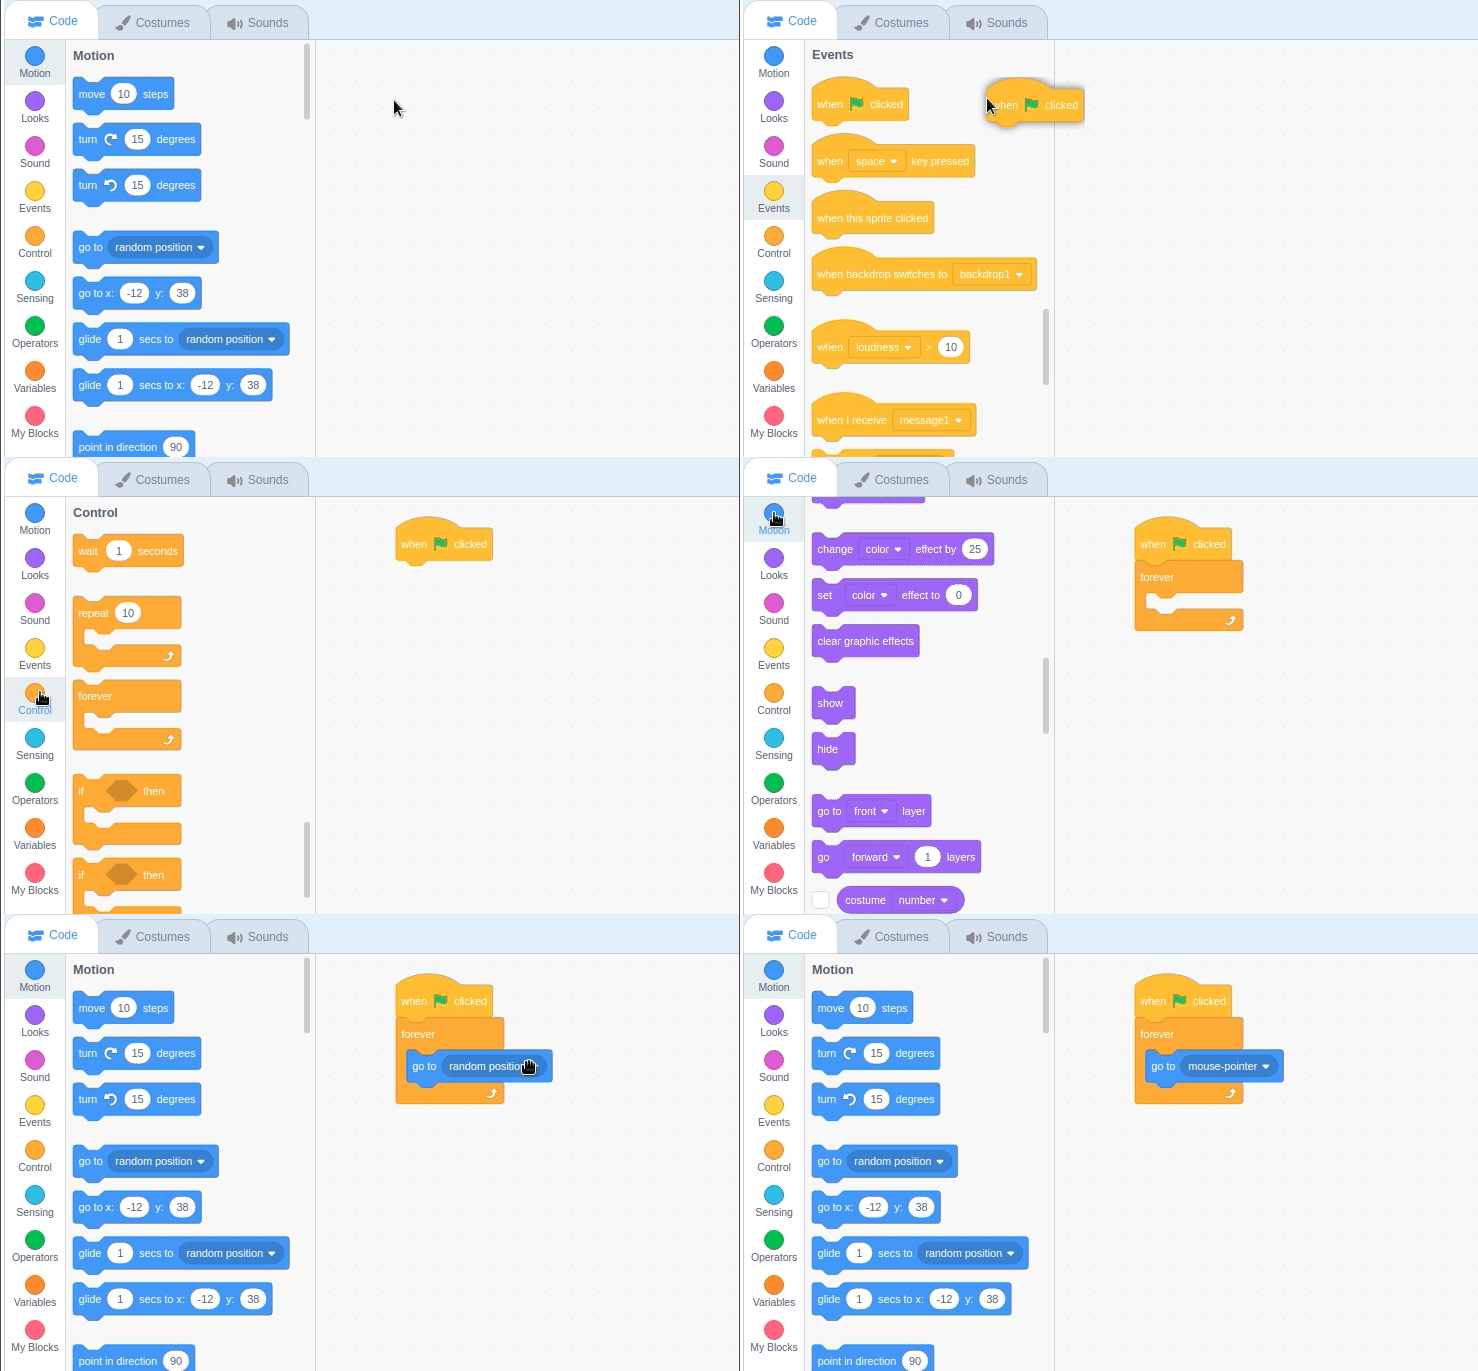
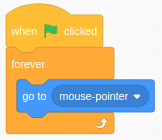
It’s good to have some early success so start off with 3 blocks to create a “Forever Loop” and have the Sprite follow your mouse.
- Events Blocks - Get the “When clicked” Green flag. You need one of these to give you an option to start your program.
- Control Blocks - “Forever” loop, A primary building block of programming. It repeats whatever you put inside of it.
- Motion Blocks - Add motion to the sprite. Have the sprite follow your mouse.
Saving Your Code
If you’re working offline don’t forget to save it! If you’re online give a name to your program in the top bar and hit enter. It will be a big help to start with good habits of naming and organizing your code.


When you get back on-line you can click on the My Stuff S folder next to your login to see your saved code.
Add Pen Extension
Don’t be afraid to add more features to your code. Under “File” select “Save as a Copy” and give it a new name (ie First-Code-Rev2). Then play around with it. You can always go back to your original if it breaks. Below we’ll add the pen extension, some pen blocks, and a couple comments.
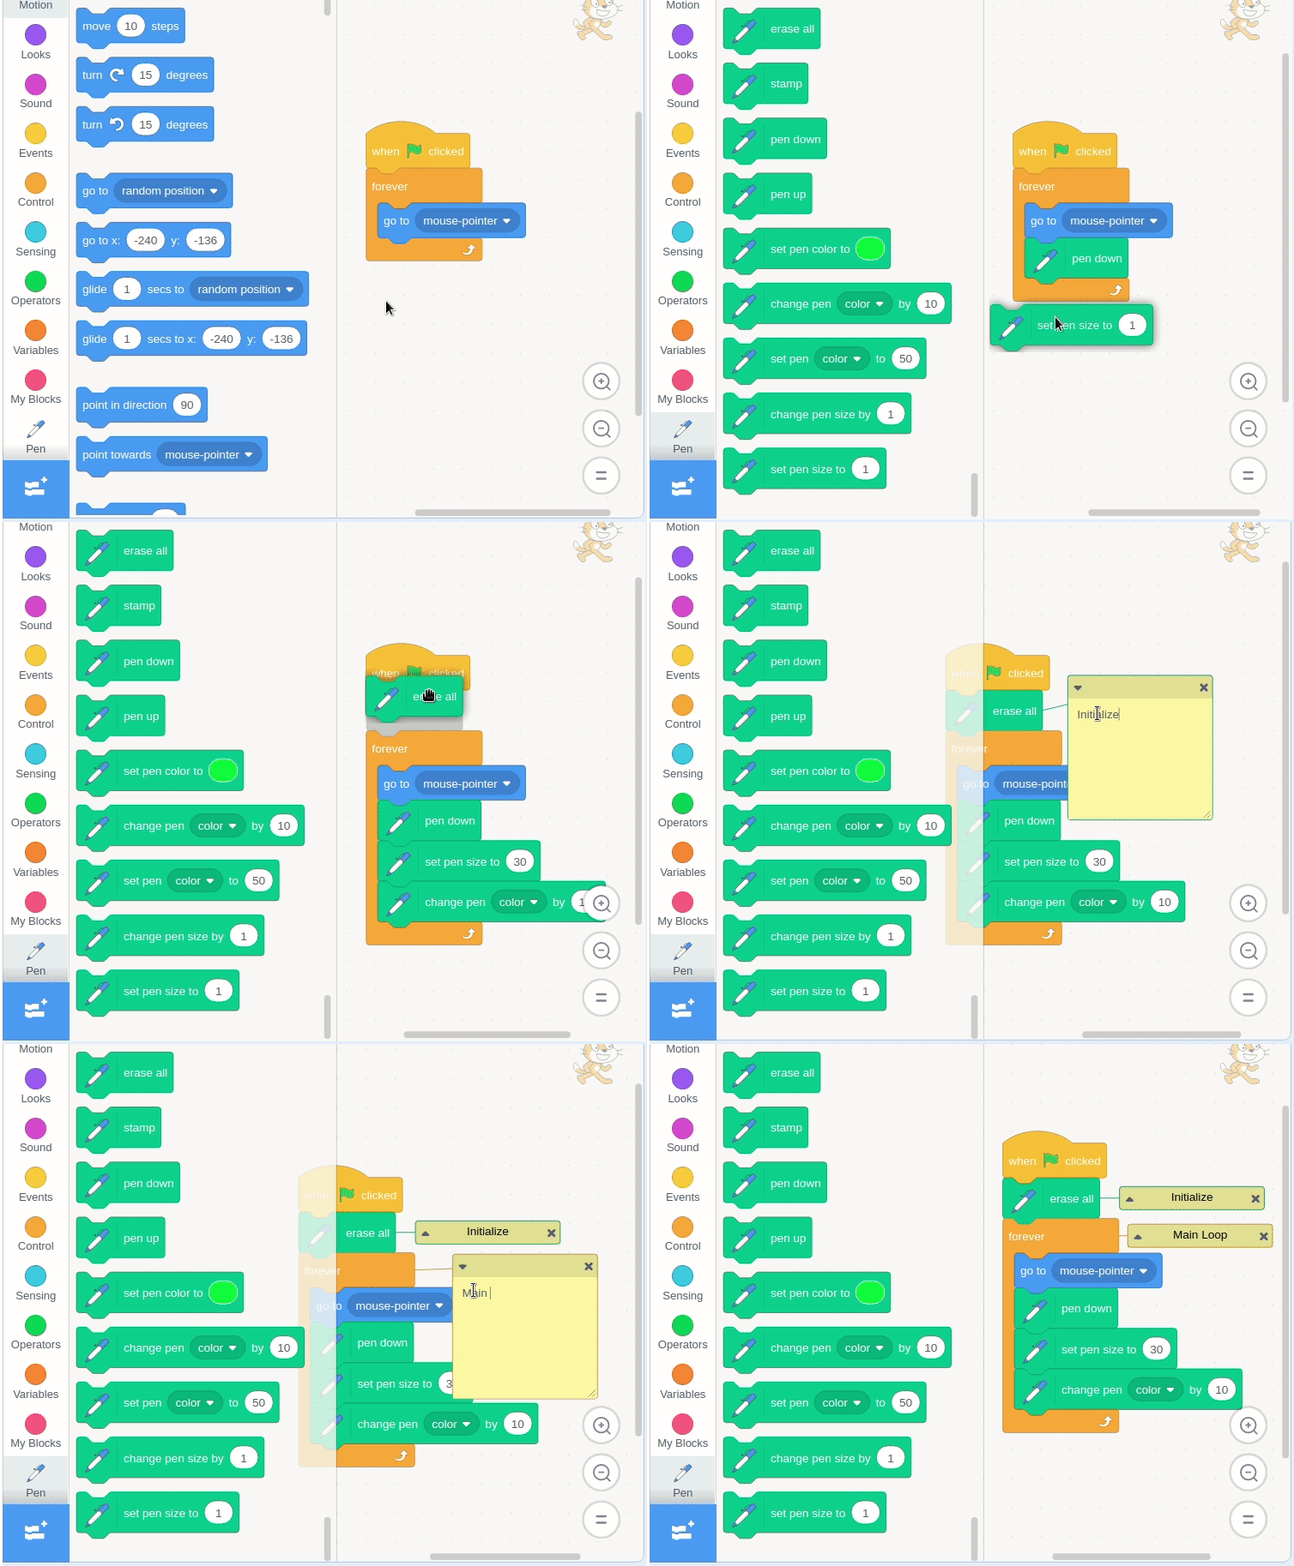
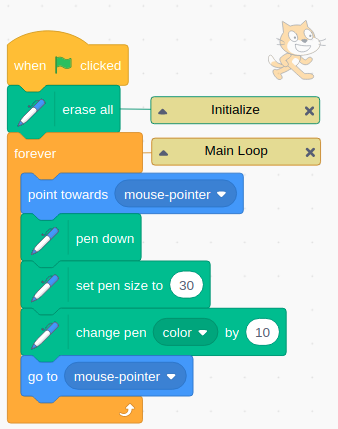
Now when you move your mouse it will draw different colors.
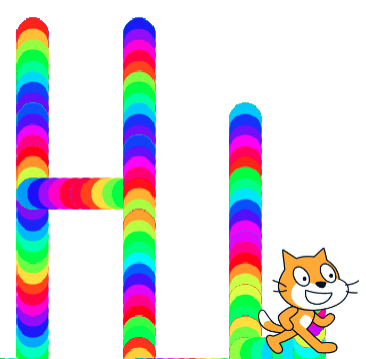
When you’re done hit the green flag and try it out!
Recap
- Scratch intro - Use the web or offline version. Create an account and start creating!
- Use “Code” blocks from event, control, and motion to make the Cat sprite move.
- Do some advanced blocks with the Pen extension
- Add good comments (valuable skill when working on code with others)
- Use the “Save as a copy” to experiment while leaving your original, working copy safe.
- You created your first code!
Thinking Ahead
- What if we want to move our sprite with the keyboard?
if we press a specific key
then we want our sprite to move a specific direction and amount. - What if we want to add more sprites and have them moving too?